How to Get a Press Pass as a Photographer
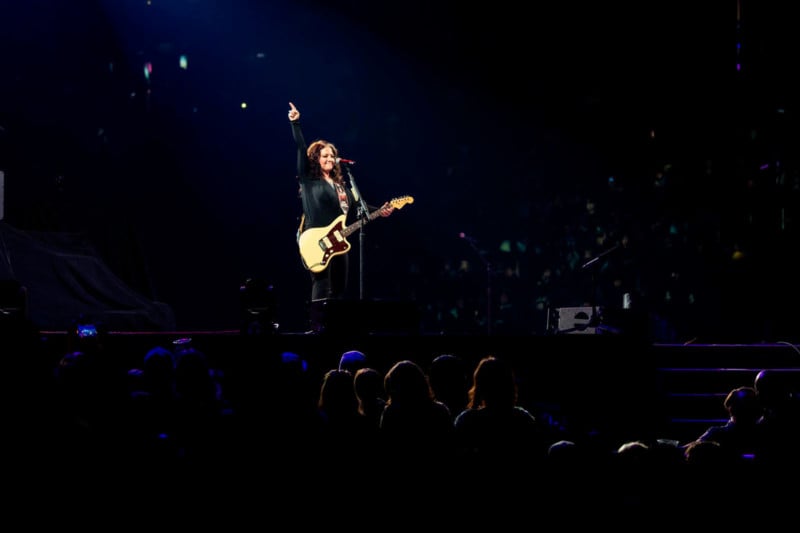
Shooting from a photo pit or area is an important part of photography niches such as concert and sports photography, but how do you get access in the first place? This is not an easy task but with a little work and dedication, you can position yourself to be allowed in this coveted area.
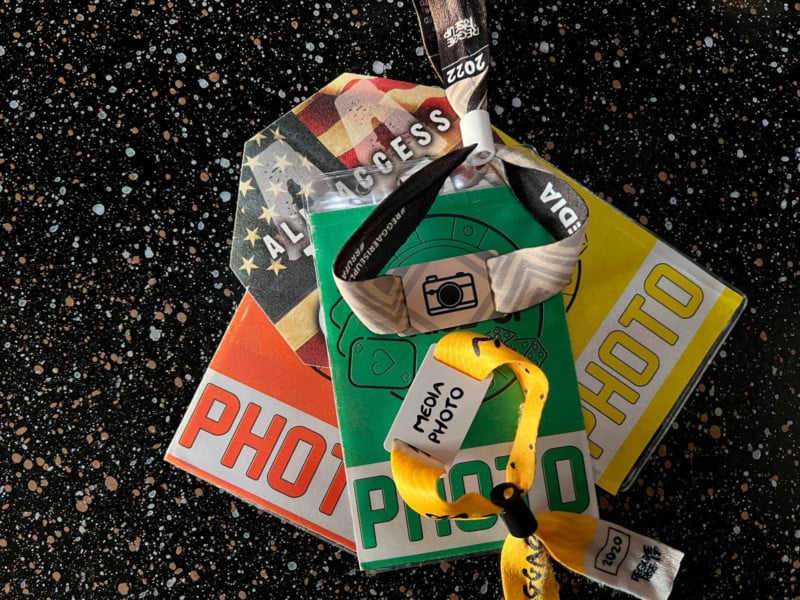
The media pass could be a card, sticker, or badge that is recognized by event staff to allow you to be in these restricted areas and give you access to designated areas to take photos. I like to carry a couple of clear ID badge holders in two different sizes to hold my media pass on a lanyard. Whenever possible, I save these souvenirs as keepsakes for the events I attended. It also looks a little more professional to have them hanging on a lanyard.
Some media passes are printed on a special sticker material that can’t be peeled off and reapplied. This is intentional to prevent others from reusing them. The stickers can, and sometimes will fall off if you stick them on your clothes as most people do. If you use a badge holder, you don’t have to worry about them peeling off and losing them.
Start Small
So how do you get a media pass? This could be a little more challenging for some photographers. If you ask any experienced live music photographer, they will most likely tell you the same thing: start small.
“Dive bars and local bands are invaluable,” says Long Beach-based music photographer Jenna Shaw. “It is an opportunity for endless content to be added to your portfolio and local bands are typically very grateful for the exposure.”
Smaller venues are usually easier to get into without too many restrictions. Your local bar or club is usually a good place to start. You can reach out to the venue’s management by asking if you can document and photograph certain performances to help build your portfolio and in return, offer some photos they can use for their website and social media.
You can also reach out to the bands scheduled to perform. Find out if they have a website or social media page and see if there is someone you can connect with. Write a short and simple email or message introducing yourself and letting them know you are a photographer who is interested in taking some photos of their performance and that you’d be willing to share a few photos with them.
The purpose of starting small is to build a portfolio showcasing your work and experience in shooting live music events. This is extremely beneficial when you need to show your work to a publication or promoter to larger venues. Most larger venues that host more popular acts won’t grant just anyone a media pass to shoot from the photo pit. To help gain an advantage, you will need to show that you have experience and the skills to shoot at these events. Your portfolio is your resume to get you in.
This could be a bit harder for some people because you will need to craft a short and simple, yet professional, message to the band’s management, venue managers, or promoters. Maybe even all three. The point is to plug as many people as you can without being annoying or obnoxious. Keep it simple and to the point. Be cordial and respectful even if they say no.
Many times, you may not get a response. If that’s the case, follow up with another message asking if they had a chance to review your previous message. If you still don’t get a response, don’t take it personally and move on.
Try Even Smaller
In the meantime, as you wait for responses and continue to research contacts, find other ways to practice. During the summer, many cities host some type of “concert in the park” event that is usually free and has a different performance each week. This is a great opportunity to practice taking photos of live bands without having to worry about getting access.
Just remember to be respectful of the performers and the audience. Don’t plant yourself in front of people and keep shooting from one spot. Move around, take a shot or two, and find another spot. Grab different angles and perspectives. Don’t forget to be aware of your surroundings and not bump into people or get in their way. This is a good time to practice awareness for when you eventually do shoot from the photo pit. Get as much practice as you can at public performances.
Remember, you don’t have to know the band or even like their music. Shooting from the photo pit is work, not a front-row seat to be a fan. These small events and performances will help start your music portfolio. Be sure to talk to the band members before or after the show. Offer to share your photos with them and ask when and where they will perform next. Now is a good time to see if you can shoot their next show.
If you notice another photographer shooting these events, introduce yourself and be friendly. Let them know you’re starting off and could use some tips. See if they’re shooting for the band or independently. It’s always a good idea to network with other photographers.
A rather unusual approach is to find out who sponsors certain events, shows, or performers. Reaching out to a sponsor and asking if you can help show their brand with the performer might get you in. Take for example if there’s a local band where the guitar players always wear a specific brand of shirts with their logo on it. That shirt company might want to see photos of their shirt in some action photos. Be creative and think outside the box.
You can even try instrument manufacturers if they have a working relationship with a musician. There are many different angles you can try to get media access. Think outside of the box and see what connections you can find as it relates to the performers or band. Don’t be afraid to try different connections and see what works.
Have the Right Gear
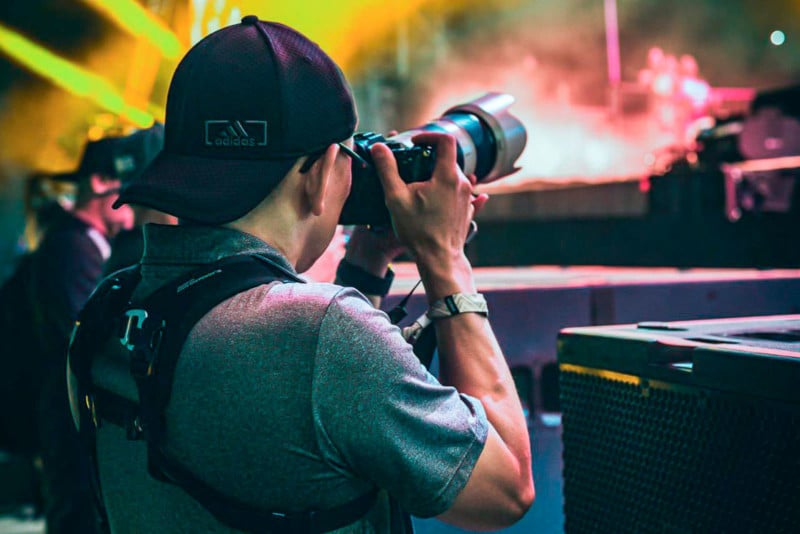
It’s probably obvious but worth mentioning that you should also have professional photo gear. No, you don’t need top-of-the-line cameras or lenses, although it does help. You will need a decent camera body and lens to be taken seriously. I’m willing to bet that if you only have a point-and-shoot camera, they will most likely pull you from the pit and revoke your pass. If anything, it will be frowned upon and you probably won’t be taken seriously in the future.
Same with cell phone cameras. Don’t approach these opportunities relying on your cell phone. There is a place and time when you might be able to pull your cell phone out and take a photo or two, but it shouldn’t be your primary gear.
Also, most venues don’t allow video, so no recording unless it is explicitly mentioned and allowed. Otherwise, still shots only.
Ideally, you should have a couple of lenses with different focal lengths to capture wide and close-up shots. You can get away with one camera body and lens but having two bodies with different lenses on each will make shooting a lot easier. Personally, I like to shoot with two cameras, one with a 24-70mm lens and the other with a 70-200mm. I’ve also shot with a 35mm prime and an 85mm prime. It just depends on how creative I want to get and the type of shots I’m after.
I’m In! Now What?
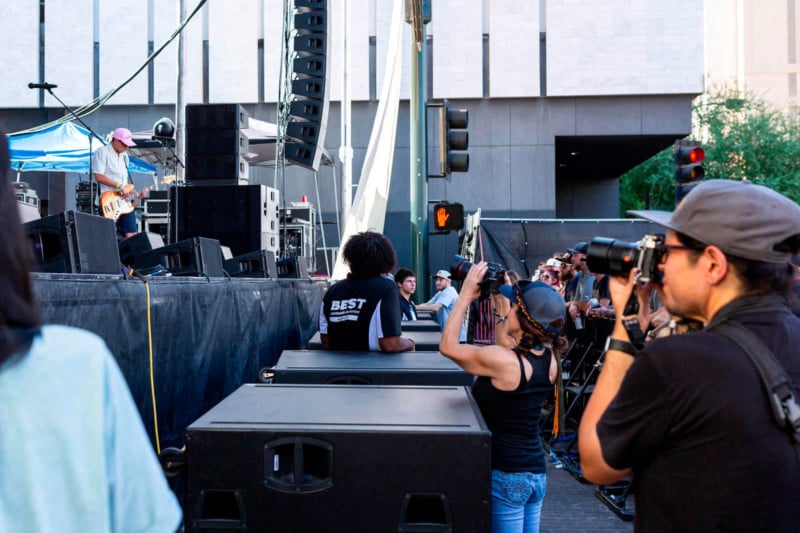
Once you are granted access and get your media pass, you will most likely get some specific instructions on where to pick your pass along with where to access the photo pit. Just because you are granted a media pass, it doesn’t mean you have an all-access pass. Don’t go backstage or on stage unless you are given specific access to these areas. If you’re not sure, ask.
The industry standard is to shoot the first three songs with no flash. After that, you may be escorted out of the pit by event staff or security. They may let you stay off to the side of the pit, but don’t take any additional photos unless you are approved to.
I can’t stress this enough: follow the rules and regulations that are given with your media pass.
At some events, I was able to go into the crowd for the rest of the show and take some photos of the band from the crowd’s perspective. These make some interesting shots as you can include the audience along with the performers. It gives the viewer an idea of what it was like to be there. Be sure to ask for permission before taking these additional shots.
One thing I learned early on is not to take photos of your media pass and post them on social media. This is tempting especially if it’s your first time having one. I made the rookie mistake of doing this and later found out it’s a practice that is frowned upon by many professionals. The reason I don’t recommend this is because some people could replicate them and make counterfeit passes. This could be a huge security issue if someone who does not belong in these restricted areas now has access.
I’ve seen some people cover part of their passes when they post them but I discourage that practice as well. Let’s face it, it’s a major bragging right to have that kind of access but it’s best to brag with your photos of the show, not of your credentials. It’s like buying or driving a new car. Show photos of the car, not your driver’s license.
You’ve worked hard to get your media pass and access. The last thing you want to happen is to be blacklisted for breaking rules or doing something that is either not allowed or frowned upon. A few years ago a member of the media at the NCAA Final Four had his credential pulled for sharing a photo of his credential on social media.
I’ve been to an event where I had both a media/photo pass and an all-access pass that gave me the ability to shoot past the first three song limitations. Media passes are like gold. Even though they may be seen openly when you are wearing them, you should guard them with some discretion. If you attend a multiple-day music festival, they most likely will have a different color badge or design for each day to discourage counterfeits and reusing and sharing the credentials.

Nowadays, most places have multiple methods of verification other than a simple pass. Some events have RFID wristbands along with media stickers to help reduce the risk of someone counterfeiting a media pass or gaining access to the photo pit.
Summary
After you get your first media pass, frame it and hang it on the wall proudly. I like to print out a few photos of the show and frame them in a collage with my media pass. It’s a nice keepsake and reminder of the events I’ve had the opportunity to capture.
Remember how hard you worked to get your media pass. What worked for one venue or show may not work with others. That’s why it’s important to build your network or contacts and try different angles.
Don’t forget to build that portfolio to help you validate your work. Showcase about 20 of your best photos that highlight your work and potential. As you shoot more shows, update your portfolio.
Most importantly, don’t give up. You might put out 10 or even 20 requests and only get one hit. Stay positive and professional and eventually your hard work will pay off.
About the author: Mario Supnet is a photographer and grant writer based in Las Vegas, Nevada. The opinions expressed in this article are solely those of the author. You can find more of his work on his website and Instagram.
Image credits: Photographs by Mario Supnet and John Bender