How to Delete All Photos from Your iPhone

Apple makes it very easy to delete a photo from an iPhone but removing all of them at once can be quite a bit more challenging. There are also some complications to be aware of, like accidentally deleting photos from iCloud. Knowledge is power and with a few tips, you’ll be able to delete only what you’d like from your iPhone and make it take effect immediately.
Table of Contents
Deleting a Single Photo is Easy
To delete one picture, you simply need to find the photo in the iPhone’s Photos library, then press and hold the thumbnail to bring up a menu of options. From the photo options menu choose Delete to mark that picture for deletion. It will disappear from view but won’t be deleted for 30 days, giving you a chance to change your mind.

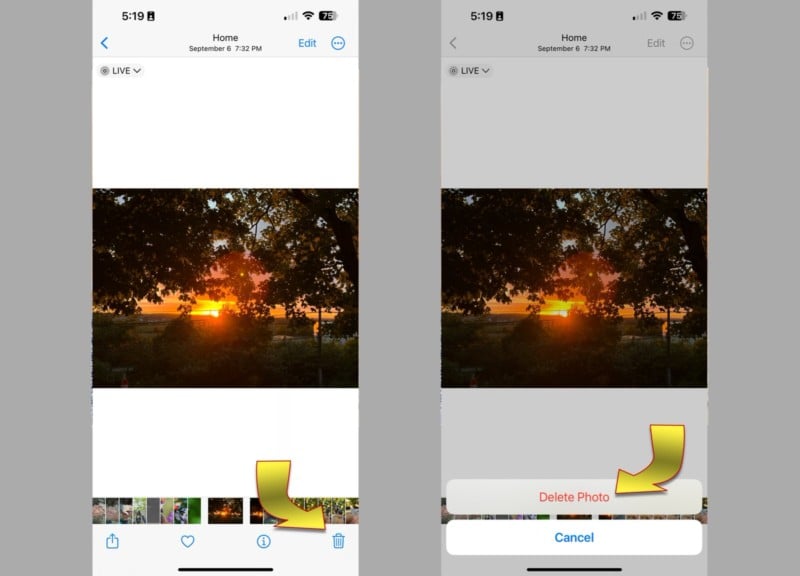
If you have a photo in full-screen view, it’s even easier. Just tap the trash can button in the bottom-right corner of the screen. With any deletion, the iPhone will ask you to confirm the removal.
How to Delete Multiple Photos and Videos
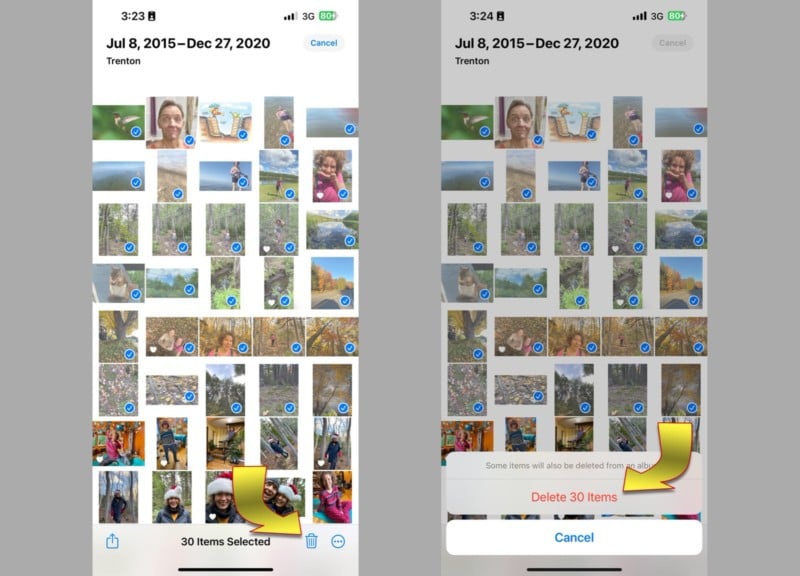
Deleting one picture at a time becomes tiresome in a hurry. Thankfully, Apple provided a way to remove multiple photos and videos from an iPhone at once. First, you need to select each picture. There are two ways to choose what will be deleted, tapping and swiping, both beginning with a tap of the Select button that appears at the top-right of the Photos library. To delete photos or videos when they’re intermingled with media that you want to keep, tap to select the ones you no longer need, then hit the trash can button at the bottom right.

If you want to delete a sequence of pictures, it’s faster to tap the Select button, then swipe across the photos to select them. Then choose the trash can to mark for deletion.
How to Select and Delete All Photos and Videos
A more challenging process is selecting and deleting all photos and videos from an iPhone. Selecting every picture in a large Photos library would be painfully slow if you tap each one. Even with the swipe method, it takes several seconds. Unfortunately, there’s no shortcut that allows you to select all photos.
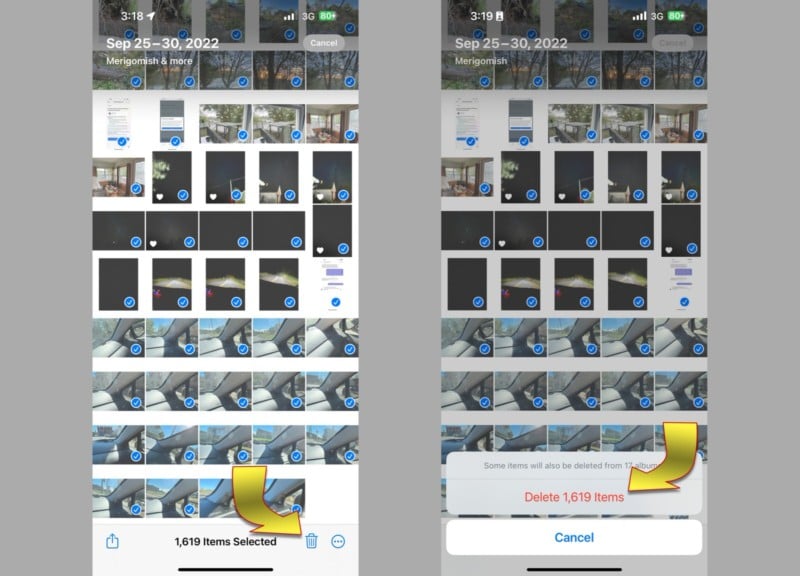
Here’s the best way to do it. Tapping the top of the iPhone’s screen will instantly scroll to the top of the Photos library. Then choose the Select button at the top-right. Starting with the top-left thumbnail, press and swipe down diagonally to the right, keeping your finger against the screen near the bottom edge without sliding off the screen and onto the bezel. The iPhone keeps scrolling down as long as you keep your finger on the screen so more and more pictures will be selected.
Eventually, you’ll reach the bottom, causing the automatic scrolling will stop. A library of a thousand photos takes several seconds and a truly massive library might require minutes of scrolling. When everything is selected, you can delete all iPhone photos and videos by tapping on the trash can button and confirming the deletion but they won’t be removed immediately.
How to Permanently Delete iPhone Photos and Videos
After selecting and deleting pictures from the Photos library, the iPhone will remove them from view but they won’t be immediately deleted. In fact, deleted media is kept for 30 days. That means you have an opportunity to recover pictures even after choosing to remove them. Sometimes you need the space right away and it’s preferable to empty the trash and permanently delete those photos and videos.
Before taking this step, it’s important to note that iCloud photos might be removed at the same time. If you are automatically synchronizing your iPhone’s Photos library to iCloud, the deletions will be repeated in iCloud also. That might be intentional but if you only want to clear up space on your iPhone while saving this media elsewhere, you should back up photos to another cloud service or a computer drive before deleting them from the iPhone.
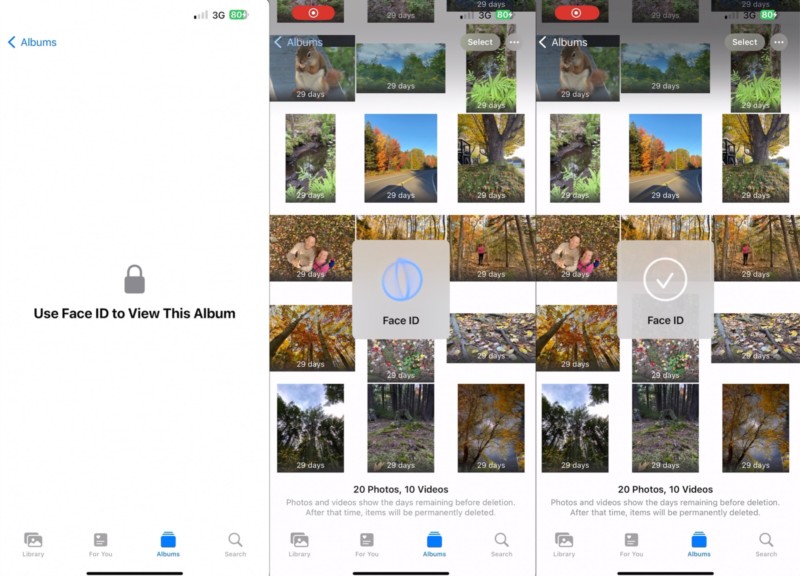
Tap the Albums tab at the bottom of the Photos app, then scroll all the way down. Then choose the Recently Deleted album. You’ll see any media that’s been marked for deletion. Tap the Select button, then the Delete All button at the bottom of the screen to immediately and permanently remove the chosen photos and videos from the iPhone. This is the only way to free up space to take more pictures.
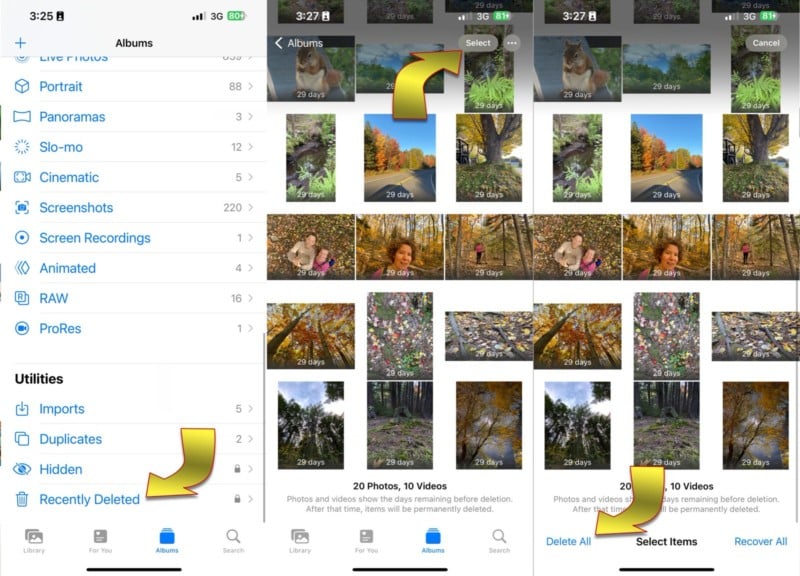
If your iPhone is running iOS 16, you need to authenticate your identity with Face ID, Touch ID, or a PIN code before entering the Recently Deleted album.
How to Select Only Photos
All of the methods mentioned above treat pictures and videos the same. If you actually want to keep all of your videos and delete only photos, that is possible as well. Tap the magnifying glass button at the bottom-right of the Photos app to open the search box. Type or swipe in the word “photos” and the iPhone will recognize this as a media type.
After you tap the Photos option from the list below, the iPhone will show locations and people, allowing you to refine your search. If you want to select all pictures, just hit the Search button on the keyboard, then tap See All. From there, use the Select button and tap or swipe photos. To choose everything, swipe up or down and hold your finger down to scroll until all are selected.

Delete Photos in the Files and Other Apps
You might have even more photos that you can remove to free up space in the Files app. Open the app, then check On My iPhone for pictures, videos, and files that can be deleted. You’ll probably see several folders, many created by apps of the same name.
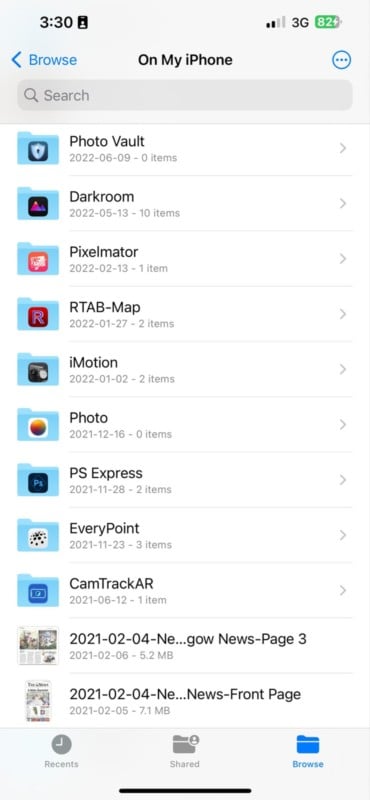
You might see Darkroom, Lightroom, Photoshop, Pixelmator, and more, depending on which apps you have installed. You can delete these files directly from the Files app; however, it might be better to open the associated app to be certain of what you are removing. Each app has its own project or file browser so the method of selecting and deleting can vary.
Conclusion
As with most things on an iPhone, Apple makes the most common option very easy and intuitive. For more advanced operations or steps that could be dangerous, it becomes more difficult to proceed. While this is by design, it can be a little frustrating at times.
Deleting all photos from an iPhone is a perfect example. On a dedicated camera, every photo can be cleared by formatting the memory card to get a fresh start. To get every bit of room possible on an iPhone, several steps are required and even after deleting, you still have to empty the trash can.
Now that you know all of the details, it should be easier to understand how photo deletions work on an iPhone. Although there isn’t a quick way to remove all the pictures from an iPhone, being familiar with the process speeds things up and prevents accidents that can result in precious memories being lost forever.