What is Loop Lighting and How to Use It for Portrait Photos
Loop lighting is a very common style of portrait lighting that is seen very often in portrait photography. In fact, if you’ve spent much time at all shooting in a studio, you’ve probably employed loop lighting without specifically trying to.
Loop lighting provides definition to facial features like the nose in addition to creating a shadow along the jawline and neck opposite the side from the light source. By altering the relative position of the main light and/or using a fill reflector or other light source, one can tailor the overall look to create the desired final image.
Table of Contents
Identifying Loop Lighting
Loop lighting can be identified by the “loop” shadow that comes from the nose. In Figure 1 of Zemfira, I’ve highlighted this shadow with the yellow oval. At first glance, loop lighting looks similar to Rembrandt lighting, and for good reason. Both loop and Rembrandt lighting are created by having the main light in your setup placed at an angle to the side and above the subject.
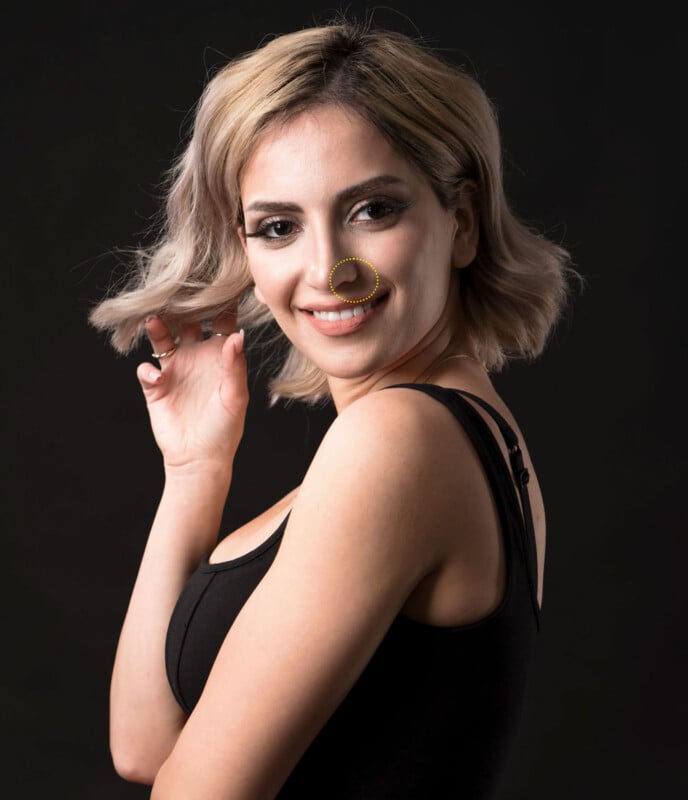
Rembrandt lighting, however, places the light further around the side of the subject to the point where the shadow on the far side from the light creates a distinct triangle of light on the cheek. Loop lighting doesn’t have as strong an effect and shows more light on the side of the face opposite the main light.
How to Create Loop Lighting
The placement of the main light for loop lighting can vary as there is no “hard, fast” rule as to how long the “loop” shadow ends up being. Generally speaking, the main light should be to one side around 45 degrees and above the subject’s eye line. In Figure 2, I have the main light positioned relatively high, however, Tanya is going to be tilting her head back so the extra height is necessary.
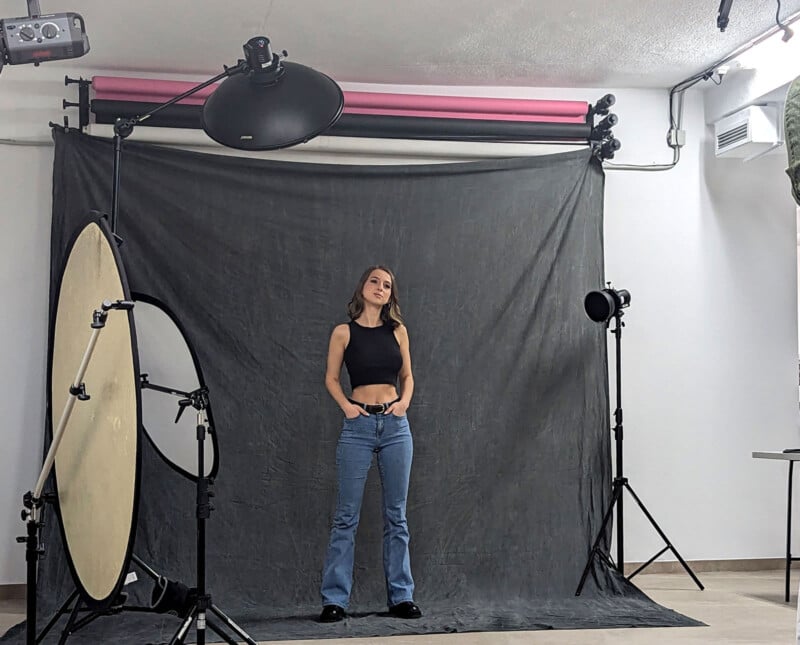
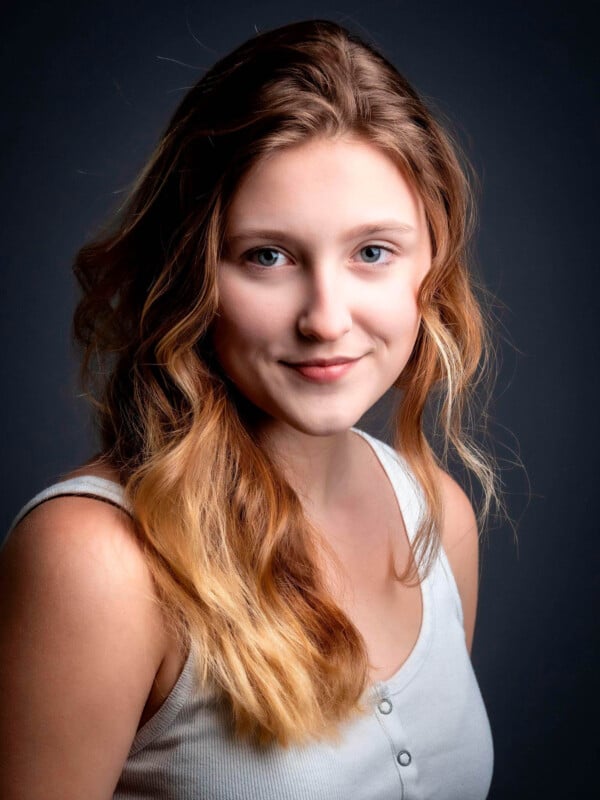
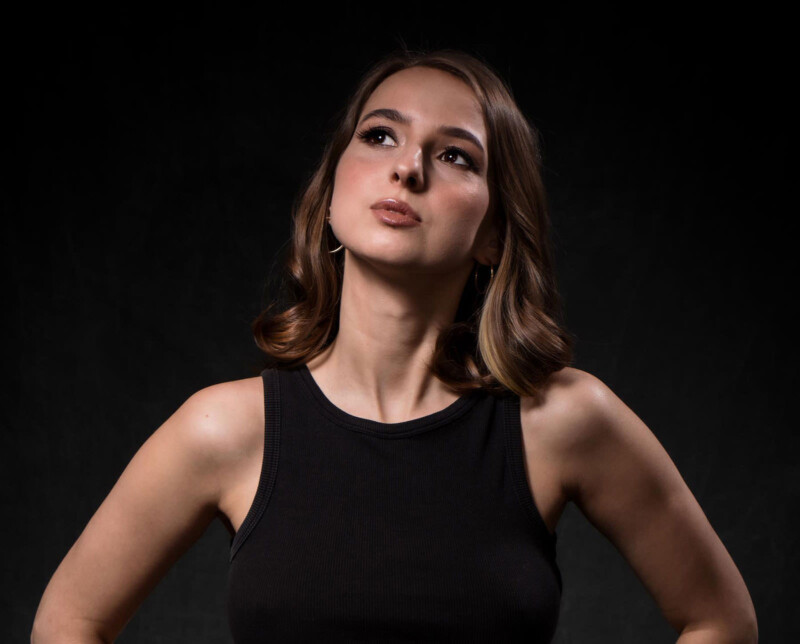
The results of the setup in Figure 2 are shown in Figure 3. Here we have a low-key image using the one main light high and at camera left. The shadows create a bit of drama without getting the mood as dark as what one might see in a Rembrandt-lit image.
A hair light is also used in this shot behind Tanya and at camera right. It is visible in Figure 2 on the right side of the image but is set lower in that view than where it actually was for the final shot. I should also note that there is a grid in the beauty dish on the main light, which is keeping most of the light off the backdrop.
So far, the example images in this guide have had an overall darker tone and dark background. Unlike Rembrandt lighting, loop lighting can easily be used in high-key environments and can be found in portraits and fashion right along with styles such as butterfly lighting.
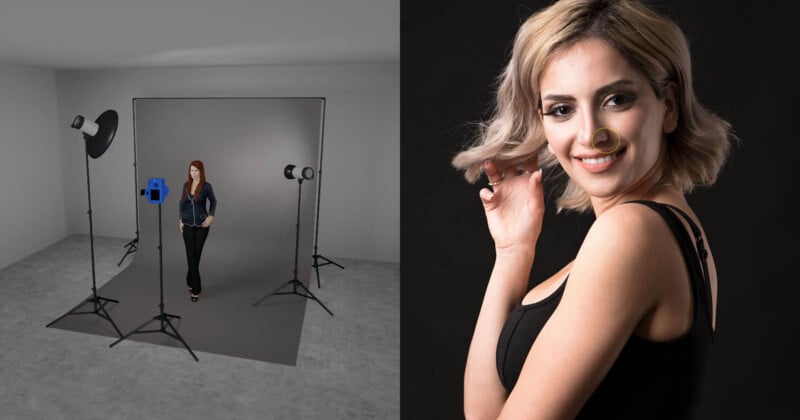
Figure 4 shows a typical loop lighting setup that, in this case, employs a light on the background to lift the overall tones of the image. Here the main light is set to camera left and above by about twenty degrees or so above the subject.
Unlike butterfly lighting, loop lighting doesn’t require the main light to be directly above and in line with the camera position. This makes setting up the main light easier as it doesn’t require a boom or extension arm to keep the lighting support out of view of the camera.

The results from Figure 4 are shown with Maya in Figure 5. We have the distinctive “loop” shadow on Maya’s left cheek and at the same time, we have a nice edge shadow from her jawline/chin that creates a thin frame around her face. The seamless gray background being lit raises the overall tone of the image here for a lighter “feel”.

The main light in Figure 5 was actually lit with a Phottix Raja 65 which is a round, 65cm softbox instead of the beauty dish shown in the diagram. Softboxes that have their diffusers in place will offer a softer light and therefore softer shadow than a beauty dish. Keep this in mind when choosing your main light source modifier in order to achieve your desired result.
The same applies to the distance of the light to your subject. The farther the main light is from the subject, the smaller the light source will become in relation to that subject, which will result in more distinct shadows.
What Gear do You Need
At the very least, you should have an off-camera light source and a medium-sized light modifier. This could be a softbox, beauty dish, or similar modifier around 20 to 40 inches (50 to 100cm). The shape can be round, rectangular, or even “strip” type boxes. In fact, strip boxes can offer some great quality of light in this type of lighting (try it, trust me!).
I should point out that while the previous examples in this guide are using at least two lights in their setup, loop lighting can be done with simply one light. I always encourage photographers that are new to studio lighting to explore how far they can take just using one light. It’s not only a good exercise to understand how that main light acts on its own, but it prepares you for that time when you are stuck with only one light due to unforeseen circumstances.
Taking a Step Back
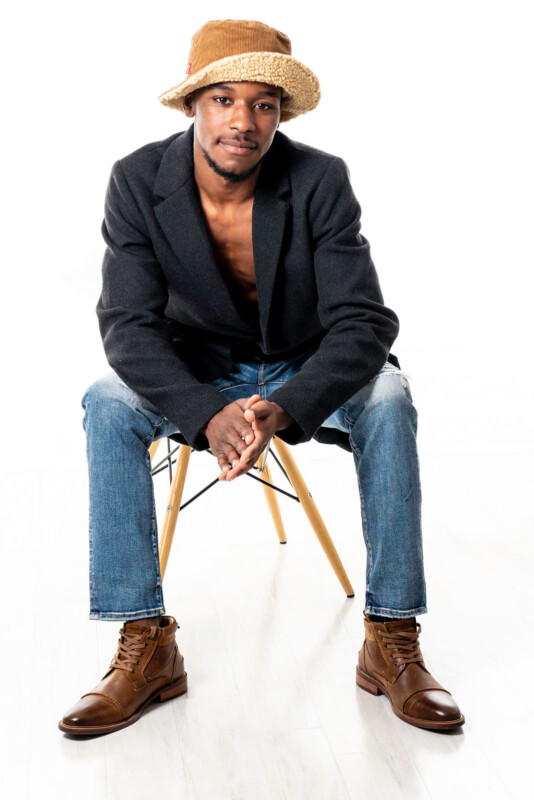
Close-up portraits are obviously good candidates for the use of loop lighting, but it also works just fine for shots where we see the entire subject. Figure 6 of Jaquarius is an example of a high-key image using loop lighting where we see the subject head to toe.
Granted, in this image he’s sitting down, but it demonstrates how loop lighting can work for images that aren’t close-up portraits. The single main light to camera left not only adds definition to Jaquarius’ face but throws some great shadows on his jacket as well as the visible portion of his chest.
Broad and Short Lighting
Another way to vary the overall look and feel of your image when using loop lighting is to change from broad lighting, like most of the previous examples, to short lighting. In Figure 7 loop lighting is being used, and I moved the camera position (and me of course) around to the short-lit side of Mandy’s face.
This changes the overall aesthetic of the image without changing the lighting setup. Using a dark background and using a grid in place on the main light has resulted in a low-key image that offers more detail of the face than Rembrandt lighting would. A low-set hair light is placed at camera right to provide some subtle detail to the hair on the left side of Mandy’s head.
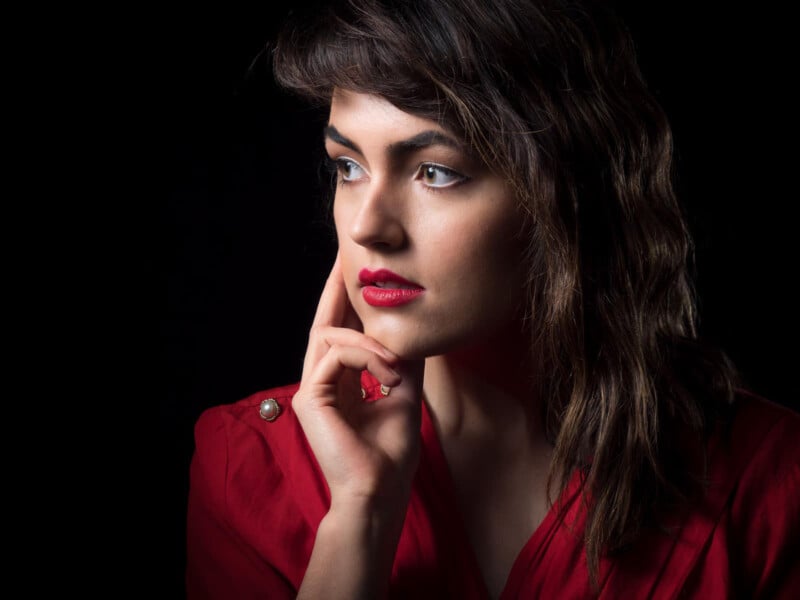
Broad lighting refers to having the main light directed at the side of the face closer to the camera position. Short lighting is the opposite, where the side of the face closest to the camera will contain shadows of facial features that are being lit from the other side of the face.
Loop Lighting is Very Versatile
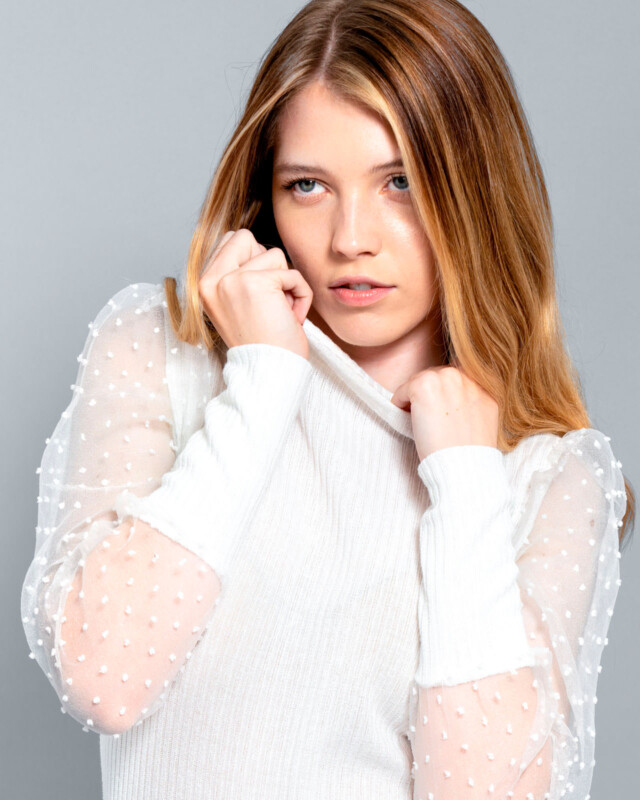
The ability of loop lighting to work well in a variety of portrait types makes it quite the versatile lighting style. The fact that it works equally well with high-key and low-key images makes it a great starting point for adding additional lights, reflectors, or other modifiers to complete the final look. In Figure 7 we have a more “formal” look to the photo of our subject, while Autumn (Figure 8) has a more commercial or fashion vibe.
Conclusion
For anyone starting out using studio lighting to seasoned pros, loop lighting is definitely an important and useful tool to have on hand when shooting portraits. It works just fine in a single-light situation, and it can also be a strong base to a multi-light setup. Finally, your main light can be a beauty dish, softbox, or even umbrella so the “cost of entry” can fit into tight budgets.
So, enough reading about it, right? Get out your gear and sit someone in front of your camera and start working with this lighting style ASAP!
Image credits: Photographs by Brandon Jackson