Why to Use Tilt Shift Lenses for Product Photography

Many people think of tilt shift lenses as something only used by specialist architectural photographers. Some actually don’t realize that they can do more than the tilt shift miniature effect emulated by the Photoshop filter (although it can give some fun results!)
Gaining Extra Control
As a product photographer, I shoot using tilt shift lenses most of the time. One reason is that they are very sharp, high-quality prime lenses. The other is the extra control that I can get from them compared to normal primes or zooms.
My main go-to lenses are 45mm and 85mm (Nikon PC-E lenses), with extension tubes for high magnification close up work. Sometimes I do use other lenses, but I have got so used to the additional flexibility of being able to tilt and/or shift that I tend to stick with these two most of the time.

What About Large Format?
Yes, you could get a large format system with bellows and movable front and back elements that you could use a wide range of lenses with. But, those systems tend to be big and bulky as well as expensive. People that use large format rigs tend to be working with medium format camera systems, rather than a DSLR like me. They are probably the ultimate systems for flexibility and control, but then you do pay a hefty price for them! Trying out a tilt shift DSLR lens is a cheaper and easier option if you already own a mirrorless or DSLR camera, especially if you are able to buy secondhand.
Let’s take a look at the 3 benefits of working with this kind of equipment.
Control Perspective Distortion
Controlling perspective distortion is the main reason why people tend to use tilt shift lenses for architecture (see this earlier article, for example). They enable you to keep buildings looking more true to life and avoid converging vertical lines when you aim upwards.
Being able to shift the lens up/down instead of pointing the camera up or down means that you can keep the shape of buildings from distorting. This feature of tilt shift photography is also useful for products. When photographing certain products or still-life subjects, controlling the amount of distortion caused by perspective can be a valuable feature.
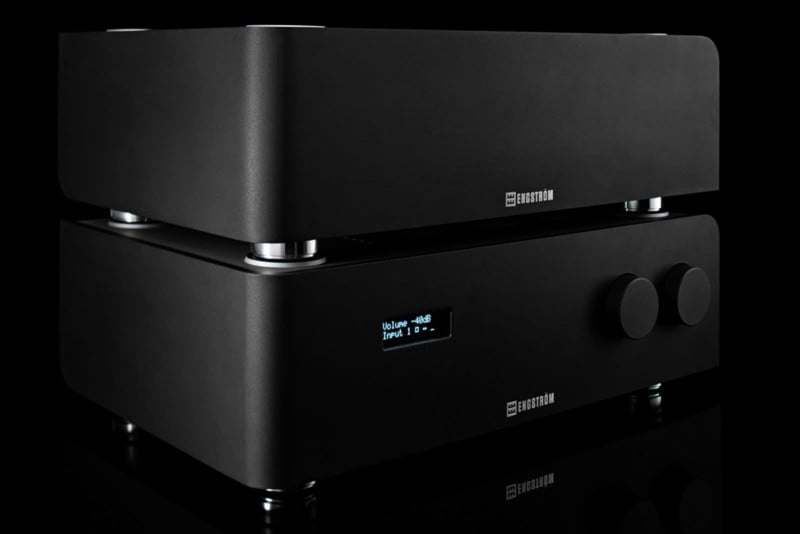
These hi-fi amplifiers I shot for Swedish high-end audio equipment suppliers Engström have a very architectural appearance. They are essentially blocks with square sides, so I decided to treat them like architecture when I photographed them in my studio. It meant that we could have a few different angles looking either more directly or from a height without introducing distortion into the images. Instead, I could shift down or up to keep the vertical lines vertical.
Obviously, architectural products such as high fi stacks are not the only thing you’ll use shift for, either. It can help with keeping bottles and other items true to their shape and minimize the distortion that can come from anything other than a straight-on view.
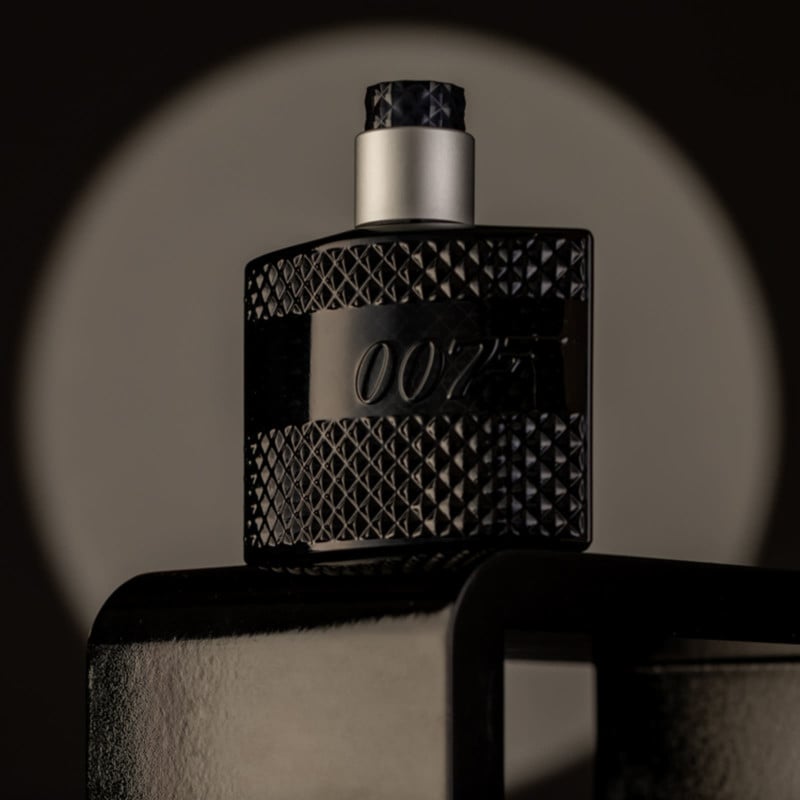
This bottle of aftershave has been shot from a heroic angle (looking up slightly from below). When we do this, the subject starts to get distorted – the vertical lines start to converge. Shifting the front of the lens up enables us to keep the same viewpoint but without the distortion.
As a commercial photographer, it is useful having the option of both in case the client has a preference. Yes, you can manipulate things to an extent using Lightroom or Photoshop. But, correcting perspective digitally rather than in camera means you will lose some resolution as inevitably some of the image will get cut off.
So, in summary, having the ability to manage perspective by shifting means that we can control how much (if any) distortion to allow in our subjects. It is exactly the same principle as for architectural work, but on a different scale. The shorter focal length (e.g. 24mm or 45mm) tends to cause more distortion when working up close. But, even a longer length such as 85mm isn’t immune from distortion. So, it is good to have the option of controlling this as much as possible.
Control Depth of Field
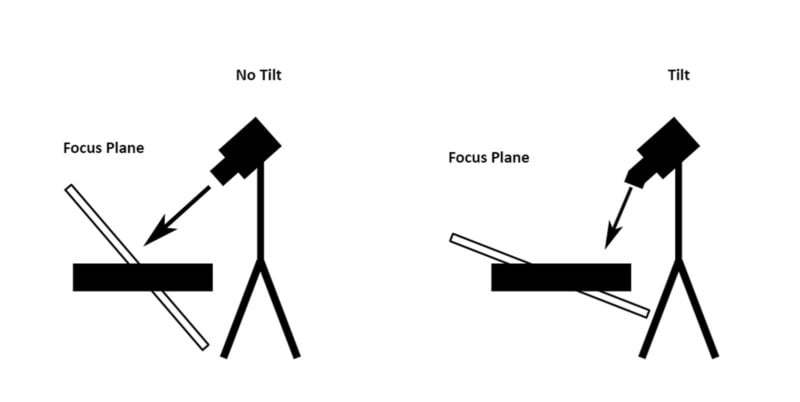
The tilt function allows you to change the plane of focus, which you can use to alter the depth of field in various ways. The closer to the plane something is, the easier it will be to keep it in focus. If something is further from the plane it is more likely to go out of focus. In the diagram above, the tilted lens gives a focal plane that allows for much more of the subject to be in focus as more of the subject is closer to that focal plane.
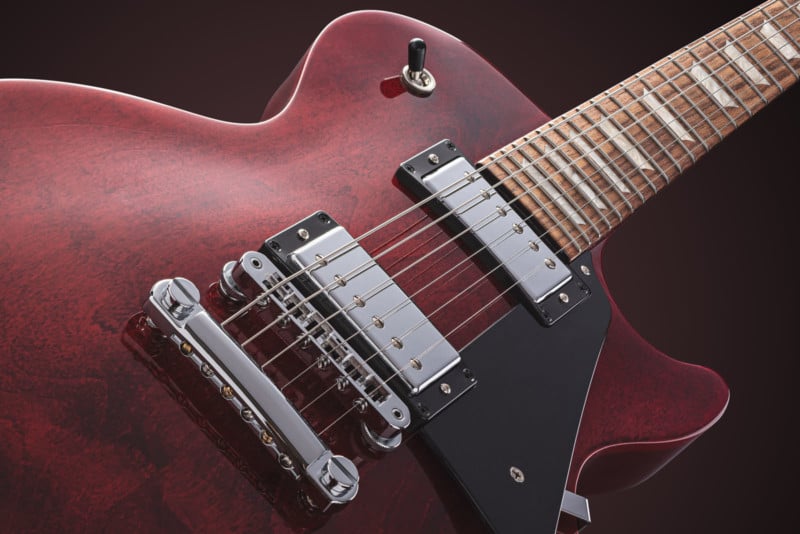
In some situations, I use the tilt function to get more in focus than normal with a single shot and without having to focus stack. For example, take a look at the image of the guitar. It is pretty much sharp all over. This was done by tilting the focal plane to be parallel with the surface of the guitar. This meant that I got a far greater depth of field than I would have with a standard lens.

For tiny subjects, it is often better to focus stack as you can then keep a mid-range aperture that allows you to get the sharpest results. But for larger items, this often isn’t necessary and a tilt is all you need. You also don’t have to worry about having enough slices of focus to stack well as it is all in one shot. One example of this in commercial work is for jewelry projects that are on a tighter budget; a single shot can be quicker and cheaper than shooting and processing a stack.
As well as increasing our depth of field, we can also narrow it more than usual by tilting away from parts of our scene. For example, the image below uses tilt to blur out fake banknotes and fake diamonds (they are actually acrylic).

They are inexpensive props that suggest a scene, but if they were in sharp focus they could mess things up as they are clearly cheap and not genuine. Using the blur achieved by tilting the lens all the way to the left means that we can get the effect we want without the problems of having everything sharp.
You can rotate the front of a tilt shift lens to enable you to tilt it to all sorts of different angles. It can tilt up/down left/right or on a diagonal depending on how you set it up. This can give a wide variety of different looks to the same scene. In the chess images below I kept the same focal point (focused the camera in the same place) while tilting the lens to move the focal plane.


Combining tilt with your usual aperture changes offers lots of creative options for presenting a scene. You may find that you need to adjust your exposure slightly as tilting all the way over can cut out a little light.
Control Reflections
As well as being able to reduce or enhance distortion and precisely refine your depth of field, a tilt shift lens offers another useful feature – controlling reflections. There are times when you need to photograph something shiny face on. The problem with this, of course, is that you will see the reflection of your camera staring back at you from the object. Using shift we can change the angle at which the camera looks at a surface. If we can get away from being completely perpendicular to the face of the object then we can instead reflect something off to the side of the camera.
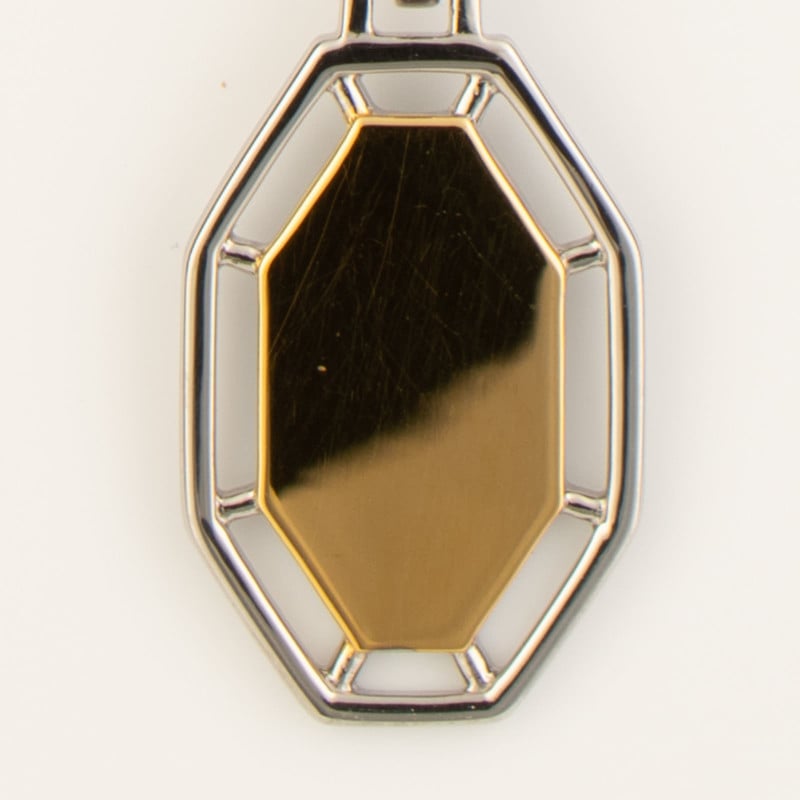
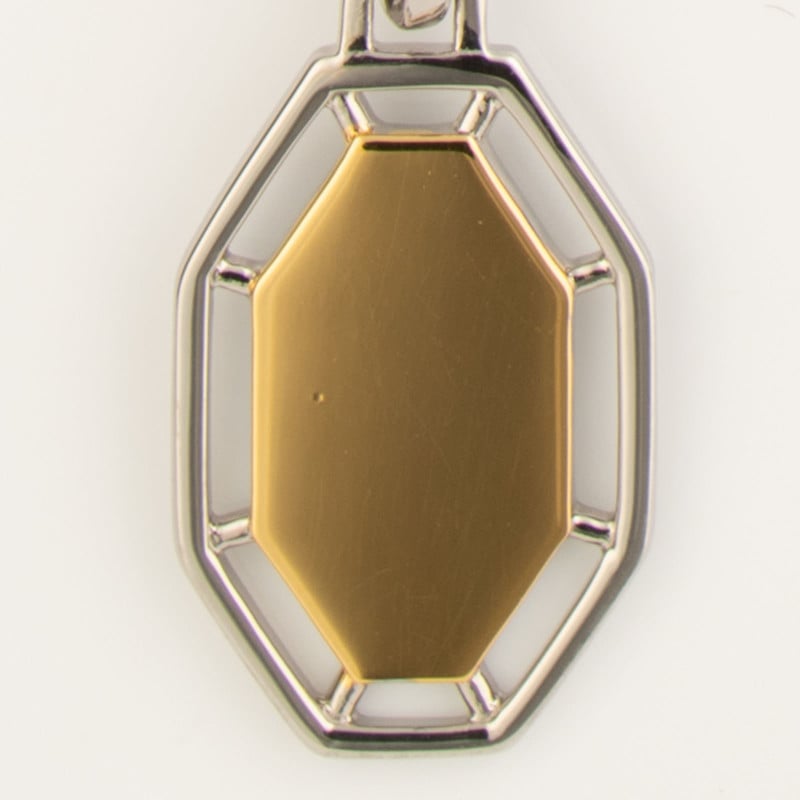
It is a common problem when photographing jewelry as the above example shows. If we move the camera off to the side and angle it in then we can achieve a similar result of minimizing any reflection of the camera. However, this has now changed the perspective and created distortion. By shifting the lens instead, you can keep a flat, front-on view without distortion.


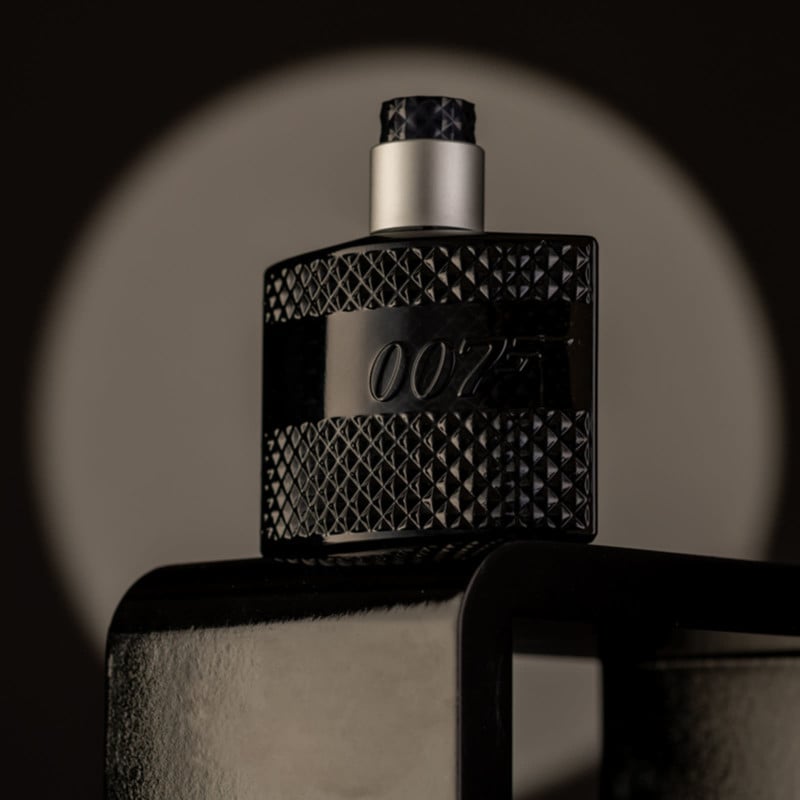
For the overhead view of the 007 aftershave, I moved the camera towards the bottom of the frame and shifted up (yes, I also changed the angle a little as well). This gave me a nice clean reflection on the bottle instead of the messy one that had the camera’s reflection in the middle.
Refining Your Style
Some of the example images you can see in this article are quite extreme uses of the tilt or shift functions. Unless you immediately connect with this kind of heavy-handed use, it might be tempting to dismiss tilt shift lenses as still a bit of a gimmick for product or still-life photography. Clearly, their features don’t always have to be used to this extent. Sometimes, just a tiny amount of tilt is enough to get more sharpness without stopping down the lens and causing diffraction.
Most of the product photography in my portfolio uses these lenses, even when it isn’t that obvious. You may need to play for a while before you find the best way to integrate them into your own style and workflow. For things like guitars, I often used a combination of both.
The Downsides
You can’t use autofocus with tilt shift lenses; they are manual focus only. This means that they aren’t really suitable for anything that is moving. But, for still life and product photography we can set everything up and leave it in place with the camera on a tripod, so manual focussing isn’t really a problem. You might need to use live view and zoom in a bit to make sure that you have sharp focus on the most important areas as it can be difficult to get it right all the time using just a viewfinder.
You often need to set the aperture using a ring on the lens rather than using the camera controls. This isn’t a big deal – you’ll soon get used to it. Some have a setting on the aperture ring that transfers control to the camera anyway. So, don’t let this put you off.
Tilt shift lenses can be quite expensive and heavy, even compared to other high-quality prime lenses. They are more specialist tools with more complex engineering and that sell in smaller quantities. This all means that they are unlikely to be cheap. You can sometimes pick them up secondhand and save some cash. Otherwise, maybe try renting before splashing out if you aren’t sure that it is for you.
The Creative World Of Tabletop Tilt Shift Photography
Hopefully, I’ve convinced you that architecture isn’t the only use for tilt shift lenses. Being able to have more freedom to manage distortion, depth of field, and reflections can make photographing some still-life subjects easier and open up creative possibilities.
I wouldn’t suggest starting with tilt shift lenses as a beginner as the number of controls to learn may simply be too much. If you already do still life and product photography, especially professionally, then I’d recommend hiring a tilt shift for a project to see how you get on with it. They aren’t necessarily for everyone.
Not all photographers are as geeky as me and many people simply don’t have that much time to spend on each shot. But, if you like to refine every detail and try new things then this may well be for you.
About the author: Joe Lenton FSICIP MA ASWPP ASINWP ADPS is a qualified international photography judge and mentor with The Society of Photographers. He is a freelance advertising photographer specializing in product and architecture photography. Based in Norfolk, UK, Joe lives with his wife and two cats, Ozzy and Sharon.