How to Smile for Pictures: 8 Tips for Perfect Portraits
It’s a beautiful, sunny day. You’re celebrating a special event with a photo session, getting your poses ready. You’ve posed countless times with family and friends, at parties, and for selfies. This should be a piece of cake, right? You say ‘cheese’ in your head and bring out the pearly whites. Then you check the camera to see the result.
As it turns out, smiling authentically is not easy. It takes a bit of science and a bit of art to make it work. If you’re in need of a ‘smile boot camp,’ look no further than this article where we describe some helpful tips to get your smile looking like Hollywood in no time.
Tip #1: Warm Up
As much as you could mechanically reproduce a smile and hope for the best, a lot of what goes into creating an authentic smile is your mental state going into the shoot. Are you nervous? It will show. Get yourself loosened up.
Have you ever heard actors doing all of those strange vocal exercises before a performance? It is important not just for voice projection, but also to loosen up facial muscles for really animated facial expressions. You don’t have to go all out with these preparations like a professional actor, but there are a few things that can help get your smile started.
Take a break to move. Shake out the stress, and do some light stretches. Make a few faces – they can be goofy – just to lighten up the mood and get the muscles in your face some exercise. An active body will produce an active smile. (But don’t get all sweaty before the shoot.)

Tip #2: Get in the Mood
If you have a photographer with you, engage in conversation. Get comfortable. A good photographer will lighten the mood and reduce any nerves going into the shoot. Ideally, you can try out some icebreakers, such as recounting a funny story or telling a funny joke. The goal is to get some laughter going, which produces a smile naturally.
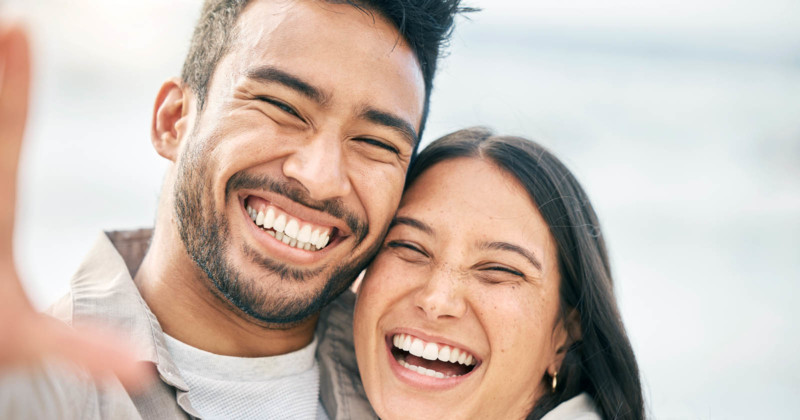
A genuine smile will endure through a whole set of photos, rather than the fake smile that disappears after the shot is finished. Of course, some people can fake it accurately, and maybe you can too. But it increases your chance of success if you get in the right mental state before the shoot where you are loose, happy, and comfortable.

Tip #3: Smizing
Tyra Banks fans will know this one already. What is ‘smizing?’ Well, imagine yourself surrounded by people with medical masks on, a la the most recent pandemic. Would you be able to tell if they were smiling? You sort of can, right?
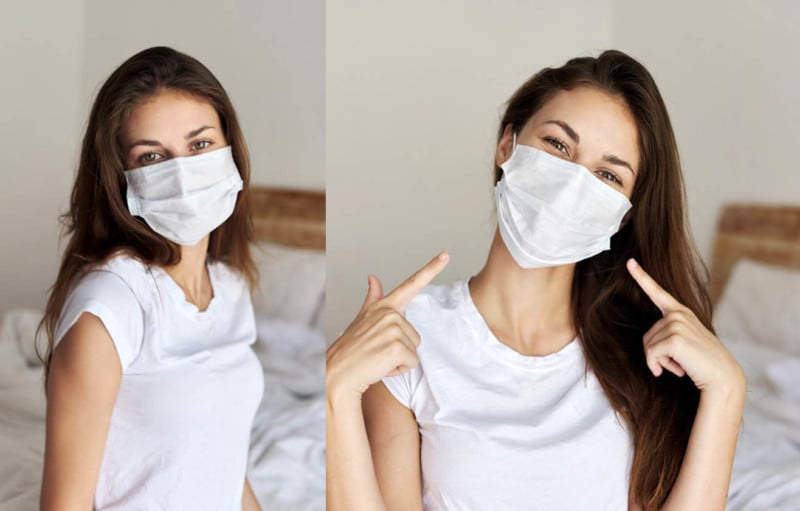
As it turns out, a lot more goes into smiling than just moving your mouth. Have you ever seen photos of people doing that “cheese” routine, yet looking fully dead in the eyes? That’s precisely what you would like to avoid when thinking about how to smile. These people are smiling on command because they have to, not because they want to. Your mission is to convince others (and yourself!) that you really mean it.
Smizing will get you to smile with your whole face. As we discussed, laughing a bit will help get these other facial muscles moving. People don’t like “crow’s feet” around the eyes, but guess what? That’s a sign of a real smile. Your eyes do a very slight squint in the process, while still remaining open and bright. This might require some practice in the mirror.
If there is too much squint, you can also try closing your eyes and then opening them again right before the photo is taken for a more natural eye look. Bottom line: can you cover the bottom half of your face and still look convincingly happy? That’s the goal.
Tip #4: Squinching
Speaking of eyes, something else you can do with them when smiling for a portrait is something called “squinching,” a term and technique popularized by portrait photographer Peter Hurley.
Squinching involves closing your eyes in a way that’s halfway between wide-open and squinting. The result is a confident, self-assured look that avoids the uncertain look that people often have when staring wide-eyed into a camera while posing for a portrait.
The difference between squinching and squinting is subtle but important: squinting involves bringing both your top and bottom eyelids closer together, causing your eyes to be small and giving you neither a confident nor self-assured look.
To squinch, on the other hand, simply lift and tighten your lower eyelid and then bring the top one down just a hair. Voila! Instant self-confidence to go along with your beautiful smile!
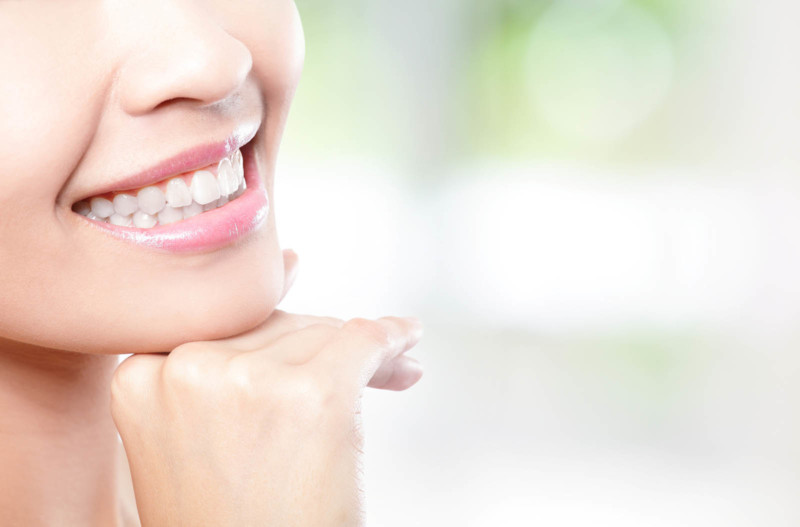
Tip #5: Pay Attention to Your Teeth
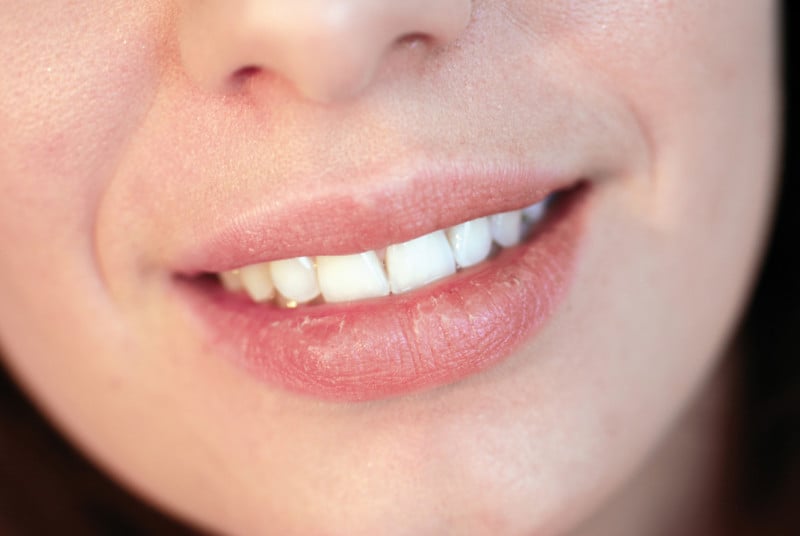
There are a few different approaches you can take with how or whether to display your teeth. If you are showing teeth, remember that they should not be forced closed, nor should they be wide open. Ideally, if you are showing your teeth, you’d like them to be gently resting on each other.
Why is this? Forcing your teeth closed can increase tension in the neck or jaw, and this becomes apparent when reviewing the photos. Nobody wants those muscly neck lines in your nice photos (unless perhaps you are a professional weightlifter). Of course, some models do it to boost their jawline, but your results are likely to vary. More often than not you will end up looking tense and/or upset, which is not the look you are going for.
Teeth also should not be wide open with the inside of the mouth showing. It’s entirely possible to smile with your mouth open, but unless you are a pro model with a lot of practice in getting it exactly right in that circumstance, don’t do it. Most people don’t end up liking the way they look in these photos, and you waste a lot of shots that otherwise might have been great. It might work for some candid photos in a series, but for your professional portraits, stick to what looks good 99% of the time.

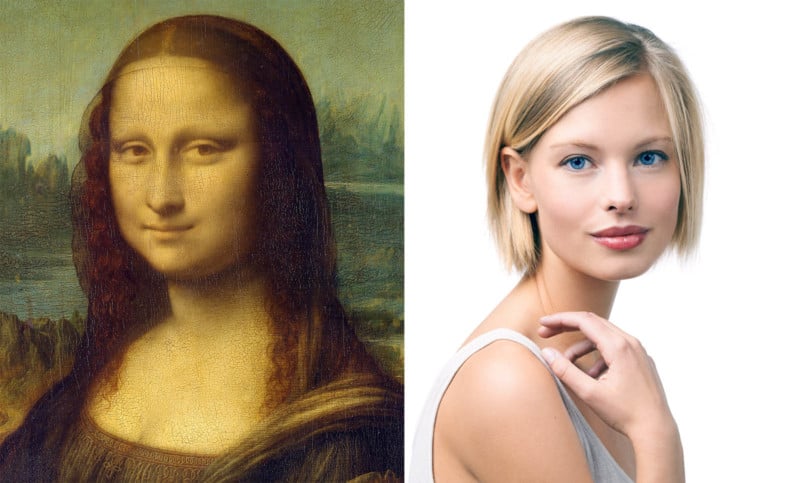
Showing teeth is also entirely optional, and in many cases a smirk can make for a great photo too. You might know this as the “Mona Lisa” smile. Many photographers will suggest that their models/subjects close their mouths at times during a shoot. Why? A subtle, closed smile can look more refined and is harder to mess up.
A genuine smile with teeth showing is often more difficult to achieve, be it because people don’t like the way their teeth look in general or because they simply didn’t get the mouth open to the right angle. Both approaches can produce great results. So if you’d like, you can switch it up and try both to see what suits you best.
Tip #6: What Do I Do With My Lips?
Just as you wouldn’t clench your teeth when smiling, you also have to make sure your lips are in a somewhat relaxed state. Too wide of a smile or lips that are too pursed can result in a strained look. If this happens to you in photos, try an outrageously big smile, then bring it down a notch to get the sweet spot. Make sure lips have a slight upward edge curve instead of a horizontal, bored look.
What else do I do with my lips? Moisturize them! Seriously, though, keeping your lips moist using some light moisturizer or lip gloss will prevent the dry, cracked look. This is especially true for close-ups.
Some people actually wet their teeth as well before each shot to keep things looking shiny and provide emphasis. And of course, for those who use it, an appropriately bright lipstick can make the lips stand out in photos.
Tip #7: Don’t Forget to Pay Attention to The Rest of Your Body
You’ve got the smile going, now make sure to remember the other basics to bring your look to its full potential. Keep a straight posture. Make sure to keep your shoulders back and neck extended, and try different angles with your face. Many people have an angle that works best for them or a preferred side of the face. Practice in the mirror to find the right angle, whether it be left/right or face forward/downward angle.

Bring the emphasis to that smile by facing the main light source. Keep hands away from the face, keep your fingers relaxed instead of balled up, and keep space between your arms and your body. Brush the hair away from your face. Seek out posing guides for the rest. Most importantly, don’t let anything else in your posture or look take away from that smile you’ve been working on.
Tip #8: Be Natural
This leads to our final cautionary advice: avoid the forced look. You’re thinking about all of these small things, hoping to produce a natural-looking smile. In the process, it is easy to appear stressed out on the outside. Perhaps the lips are too tight. Perhaps we can see your neck muscles straining. Maybe you have those crazy eyes going on. If this happens to you, go back through the earlier routine and try to loosen yourself up a bit.
The look you are giving should be no different than one you might give while hanging out with good friends and recalling a funny story together. Imagine the camera is your friend, and you are engaging with them in a fun way. The resulting smile would come naturally. If it doesn’t come out the way you’d like right away, go back and try again with a mirror: practice, practice, practice! Eventually you will get the smile you want just based on muscle memory and be always ready for the next big shoot. Good luck!
About the author: Adam Klann is a freelance photographer based in Bangkok, Thailand. The opinions expressed in this article are solely those of the author. You can find more of Klann’s work on his website, Twitter, and Instagram.
Image credits: Photos from Depositphotos