What is Dynamic Range in Photography?
We’ve all heard the term “dynamic range” when reading the latest and greatest offerings of camera manufacturers — “this camera has the highest dynamic range in its category!” We understand that a greater dynamic range is generally a good thing to have.
In this article, with the goal of understanding the technical aspects of photography and photographic equipment, we will explore the particular phenomenon that is dynamic range.
Table of Contents
Dynamic Range: An Example
Before we start here, consider this question: Have you ever had a secret or an ‘aside’ comment that you needed to whisper to the person next to you? You had something to say that you didn’t want anyone to hear, and needed to say it discreetly (“Why are we holding this long meeting when a simple email to the group would suffice?”). Do you ever wonder why we whisper?
The answer may be obvious, but more specifically, we don’t want people to hear what we are saying. In technical terms, a primary source of sound is what is called a “signal.” When a signal is too low for something to detect, or the output is too low, we say that signal falls outside of the dynamic range of that thing.

It could be a person’s ear or eye, it could be a microphone or speaker, or it could be the sensor on your camera. We whisper because the sound it makes falls out of the dynamic range of the distant listener’s ear. That ear can’t properly capture and make sense of the whisper from a distance.
Additionally, let’s say this room has a projector that contains a fan and an air conditioning unit blowing cool air. The person speaking at the front of the room speaks with his or her voice. This ambient noise in the room — all of these things combined — can actually be considered “noise” relative to the person whispering in the back.
If the “signal” whisper is lower than the ambient “noise,” the end result is that the signal is inaudible to most people in the room. The higher the “signal-to-noise” ratio, the more clearly the signal is received.
The Technical Stuff
This, of course, also applies to photography. Dynamic range, as it applies to your camera, can actually be calculated as the ratio of the largest and smallest values that can be detected by a sensor. Specifically, the camera is detecting luminance values, as opposed to audio signals in the example above.
Note that it can also mean output, so a scene that you are photographing also has a dynamic range. If the dynamic range of the scene falls within the dynamic range capabilities of the camera you are using, then you theoretically have the tools to capture both the lightest and darkest parts of the scene without loss of information.
You’ve almost certainly heard of the concept of “stops” somewhere in photography, and perhaps you’ve heard it in the context of dynamic range. As we mentioned before, it is often advertised for cameras where a sensor can be said to have a range of 13 or 15 stops of light. Sometimes this is also expressed in terms of contrast ratio — a 10-stop difference between the brightest and darkest part of a scene being a 1000:1 contrast ratio, for example).
You may have also heard it in the context of photographic film, which is in itself just like a digital camera sensor that records luminance values. A particular variety of film might be capable of detecting a certain range of luminance values, like 10 or 13 stops of light.
A stop of light is simply describing either doubling or halving the amount of light in a photographic image. If you increase the exposure by one stop, you increase the amount of light in a photo twofold. The next additional stop multiplies the light by two again, and so on, and so forth. So the dynamic range of a sensor tells you how long you can keep doubling or halving this light before it no longer can accurately record the data in the highlights or shadows, respectively.
What happens when the sensor can no longer record this information? The information is lost. We often refer to this as “blowing out highlights” or having “crushed shadows.”
Even if you bring up or down exposure in post-processing, the information is simply not there. Shadows remain black, blown highlights remain 100% white with no detail. This information fell outside of the dynamic range of the sensor’s capabilities.
How Do We Practically Use Dynamic Range in Photography?
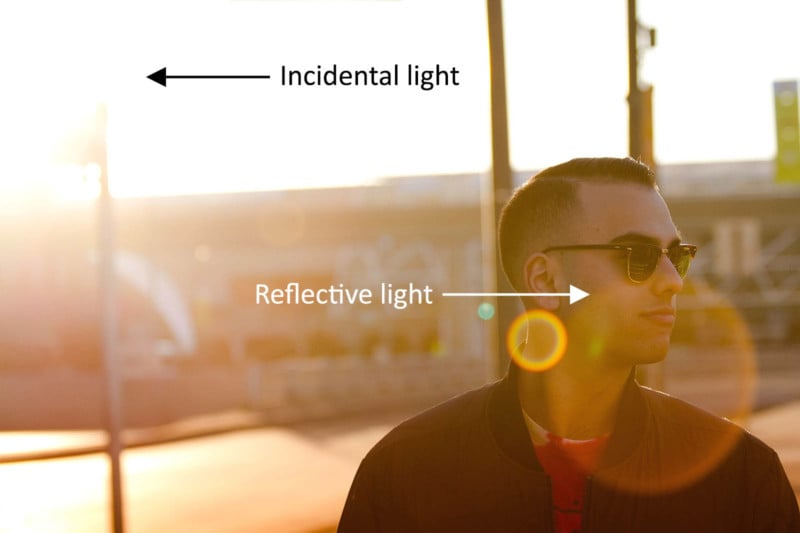
So what can we do to avoid this situation? When considering lighting in a scene, a photographer should consider both reflective as well as incidental light.
Metering for reflective light means that you are calculating the correct exposure for the light that is bouncing off the subject from the light source (sun, flash, light bulb). Conversely, if you meter for incidental light, you are metering for the light source itself. This makes a difference when attempting to retain detail in the scene.
When metering for the shadows or reflective light, there is a chance the highlights may be blown out if the incidental light is too high for the sensor to record. If metering for incidental light, like the sky on a sunny day, you might find that the shadows are crushed. Researching how your metering modes work, if you are not familiar, can help to properly expose a high dynamic range scene.
As an example: If the background sky is 16 stops brighter than the subject’s face, and your camera’s dynamic range is 14 stops, you will have to make a choice of losing information from the sky or from the subject.
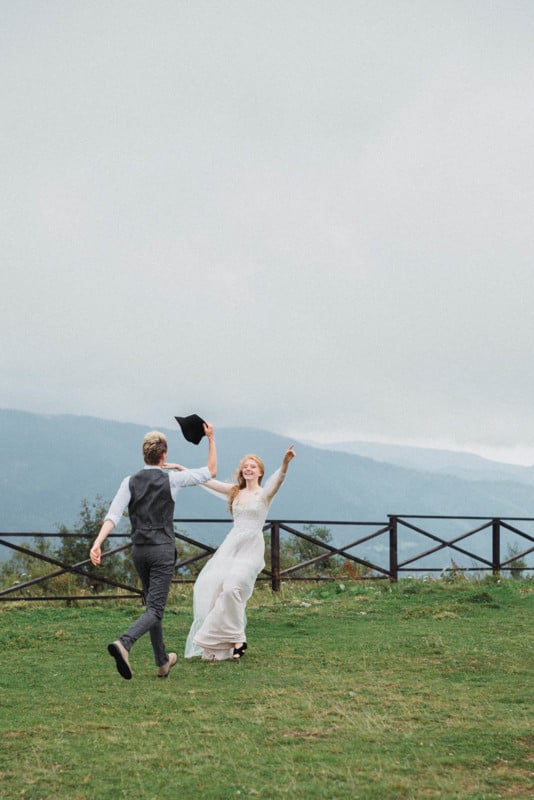
If you’ve ever spoken to an outdoor event or wedding photographer, or are one yourself, you might understand why they often prefer overcast skies. This is because it reduces the dynamic range of the scene, thus increasing the chance that all available light is able to be captured by the sensor. There is less of a chance of blown highlights in the sky or on a person’s face, and light appears more even on the subjects.
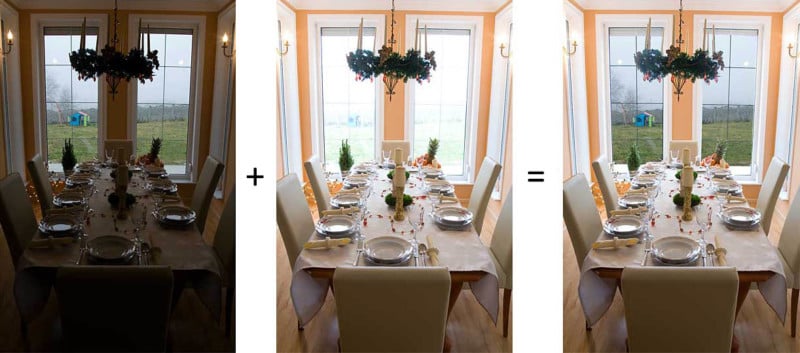
If you don’t have the option of changing the lighting of a scene at your location, HDR photography can also help combine images to avoid loss of information. This is a technique in which a photographer shoots multiple photos of the same scene or subject at differing exposure values to capture a wider dynamic range between all the photos.
By selecting the properly exposed regions in each photo and combining them into a single shot, the result is a photograph with a wider dynamic range than the camera could have achieved in a single exposure. This process can be done both manually as well as with specialized HDR software.
In photography, a higher dynamic range will also allow for a higher signal-to-noise ratio. This becomes more important in low light situations, such as astrophotography, where there can be a lot less signal (starlight) relative to the base noise a scene or camera produces.
Absent sufficient aperture or shutter speed, the camera will simply have to attempt to amplify both the signal and noise in order to get a usable image. This can lead to noise being apparent in an image. Having a camera sensor with a higher dynamic range reduces the amount of noise relative to signal, thus leading to cleaner images in these types of situations.
Film vs. Digital
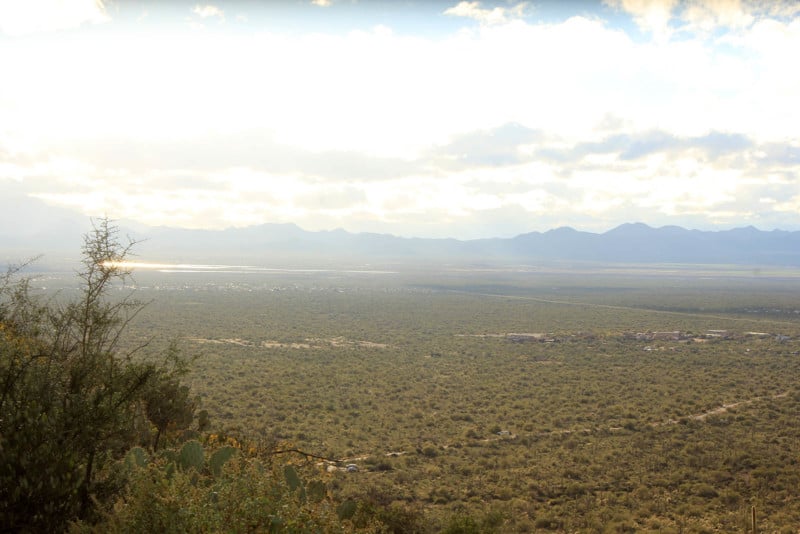
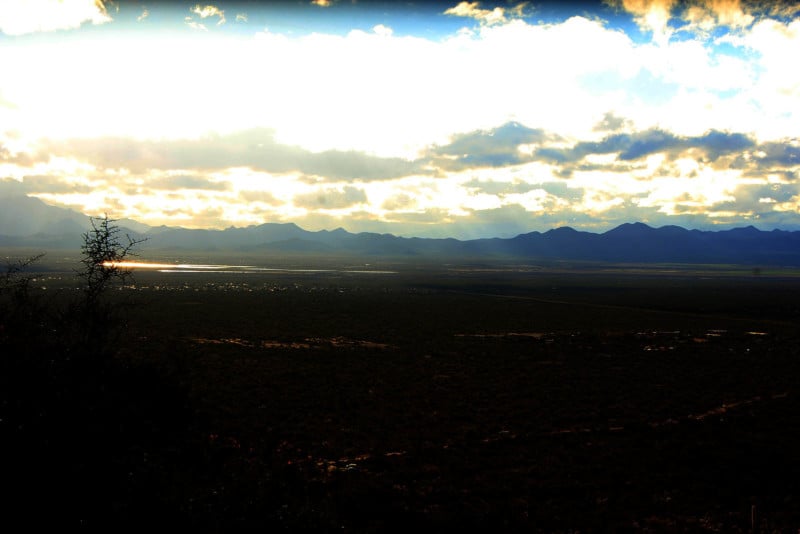
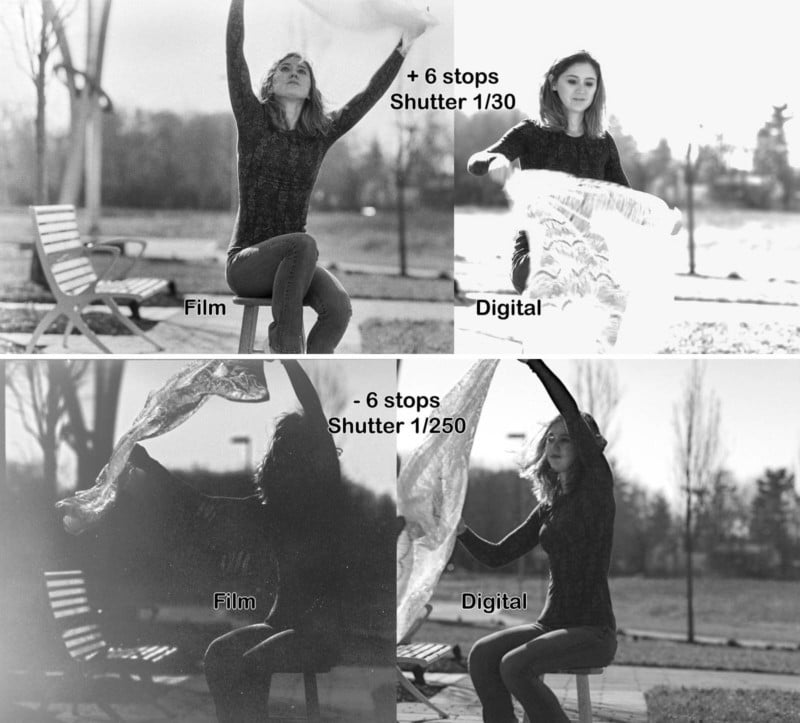
How does dynamic range factor into the exposure of film vs. digital photography? Here is a basic tenet of exposure for each: “When shooting film, expose to the left. When shooting digitally, expose to the right.” We have heard this often repeated, and perhaps we even put it into practice. Did you ever wonder why this advice is offered?
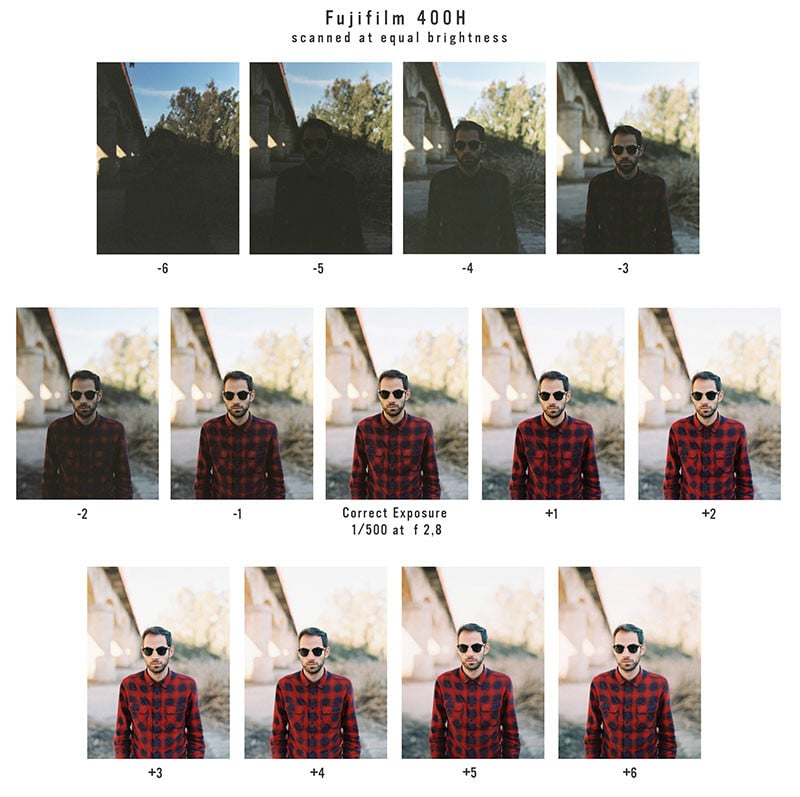
The way each medium records and retains light is different. Film stock typically retains highlight detail relatively better than digital sensors can. If you expose to the left, metering for shadows, typically you will have some leeway in retaining highlight detail in post-processing. Various film stocks can retain highlight detail at 8 or 10 plus stops (+8EV or +10EV) above shadow luminance values, so this helps retain shadow and highlight detail better than exposing to the right.
If we expose for highlights with film stock, there is a greater chance that shadow detail will be lost as film doesn’t handle bringing up shadows as well. A film’s exposure value rating might only be -4EV on the low end.
For digital, on the other hand, exposing to the right allows us to retain highlight detail, as digital sensors are much better at retaining details in the shadows (let’s say -10EV for some digital cameras) and similarly worse for highlights (+4EV). Thus, it is important to consider not only the total dynamic range but also the processing flexibility within that range of the chosen medium.
Digital Image File Formats
You may have read before about different digital formats like RAW and JPEG, and how RAW files store a greater amount of information than JPEG. This also has implications with regard to dynamic range. Photos taken in JPEG format necessarily contain less information, and thus this also reduces the ability to recover highlights or shadows in post-processing. The “effective” dynamic range is reduced due to file compression. Photographers will benefit from the full dynamic range capabilities of their sensors when they use RAW files.
The Joint Photographic Experts Group, the committee that created and maintains the JPEG digital image standard, also launched a next-generation compression standard called JPEG XT in 2015. This is a backward-compatible extension to JPEG that supports higher bit depths, higher dynamic range, and improved color representation.
Here are how some of the most popular digital image file formats compare in terms of dynamic range:
- JPEG is a lossy image compression format that uses 8 bits per channel for color information. The dynamic range of JPEG is limited, resulting in a reduced range of light levels and color information compared to other formats.
- TIFF can be a lossless image format that supports a variety of bit depths, including 8 bits per channel, 16 bits per channel, and 32 bits per channel. The dynamic range of TIFF is higher than JPEG and depends on the bit depth used. A TIFF file using 16 bits per channel will have a higher dynamic range than a TIFF file using 8 bits per channel.
- RAW refers to a large number of lossless image formats that store unprocessed image data directly from the camera’s sensor. RAW files typically use 12 or 14 bits per channel, which results in a high dynamic range. Raw files allow for greater control over the final image and provide more flexibility in post-processing — photographers are able to “save” underexposed or overexposed photos to a much greater degree than with a JPEG image.
Tools for Reducing Dynamic Range
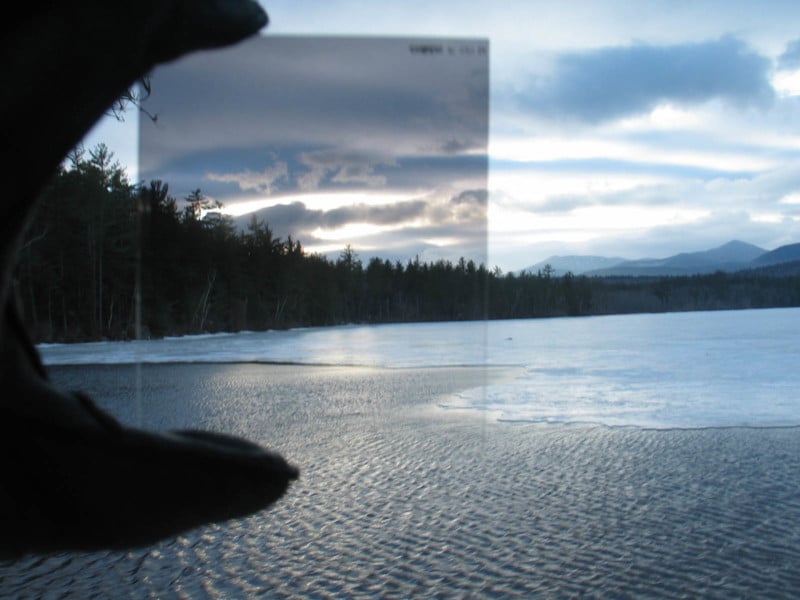
When a scene’s natural dynamic range is too high, there are also other tools that can be used to help keep everything within the limits of the sensor’s capabilities. In landscape photography, for example, you might find a graduated ND filter helpful. This darkens half or part of the image, usually the sky, thus reducing the total dynamic range.
So What Dynamic Range Do I Need?
With an estimated 21 stops of available dynamic range, your human eye will still outperform the sensors on most digital cameras. High-end digital cameras these days offer at least 12 and upwards of 15 stops of dynamic range. If you are in the market for a higher-end camera, this is a good base range to target.
Having a camera with the capability to capture as much of the range of light as possible in a scene will give you greater flexibility both in the field when choosing a scene and also later in post-processing. This is especially important if you are a photographer that likes to capture high-contrast scenes and yet wants to retain detail.
So go forth and photograph, knowing hopefully a bit more about how consideration of dynamic range can benefit your photographic process.
About the author: Adam Klann is a freelance photographer based in Bangkok, Thailand. You can find more of Klann’s work on his website, Twitter, and Instagram.
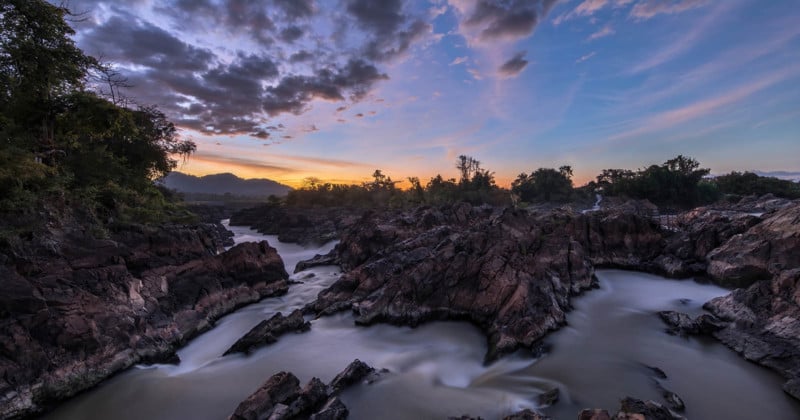
Image credits: Header photo by Basile Morin and licensed under CC BY-SA 4.0.